Feature Ship: Gorn CA
By
E.L. "S'faret" Crisler
This article originally appeared in
Hailing Frequencies issue 5. It has been recreated here from the
original material.
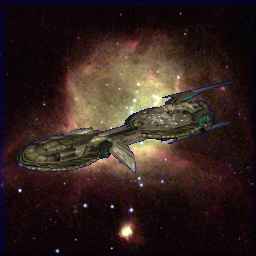 The Gorn CA is one of the least talked about of the
early era CA ships. Every knows the CA’s for the other
races and they are discussed on a regular basis but the
Gorn ship plods steadily along without the lime-light or
complaints that the other early era CA’s suffer from.
Now why is that? Is it the most powerful ship in the
era? No that would stir some discussion. It also is not
the weakest ship. In fact in raw weapon stats it is
middle of the road for early era CA ships. It is this
middle of the road attitude that makes it so easy to
overlook. However in verstility it is not middle of the
road, in fact it is the most versatile ship in the game
for early era play.
The Gorn CA is one of the least talked about of the
early era CA ships. Every knows the CA’s for the other
races and they are discussed on a regular basis but the
Gorn ship plods steadily along without the lime-light or
complaints that the other early era CA’s suffer from.
Now why is that? Is it the most powerful ship in the
era? No that would stir some discussion. It also is not
the weakest ship. In fact in raw weapon stats it is
middle of the road for early era CA ships. It is this
middle of the road attitude that makes it so easy to
overlook. However in verstility it is not middle of the
road, in fact it is the most versatile ship in the game
for early era play.
This seems
like a bold statement, and it is. But the Gorn CA has
the most tactical options of any ship in the game for
its era. And as the passage of time occurs and upgrades
are offered this versatility is improved upon, keeping
it the best CA built. Let’s begin with the early era
version of the Gorn CA and look at what it brings to the
table.
The first
place we will look, and perhaps the most important, is
the ships power. The Gorn CA has a total power of 38,
this does not include batteries. The reason power is the
most important is that it is the basis for everything
else on the ship. The Gorn CA has the second highest
power availability in the game for a Cruiser class ship.
At 38 power (the D7 has 39) the Gorn ship can perform
most tasks and maintain a decent speed. The Gorn CA can
hold a speed of 20 and still charge all weapons at full
capacity. Various factors such as ECM and Phaser
Capacitor settings can affect this to various degrees.
But at the default setting speed 20 will charge
everything.
What this
means to the Gorn player is that he has power to play
with. Once the Phaser capacitors are charged more power
is available. Also by making some tweaks a speed of 25
can easily be maintained and a good weapon recharge rate
held. This adds to the versatility of the Gorn CA.
Okay, now
that we have an idea of the power we have lets look at
how we can use it. The first major use is movement. The
Gorn CA is renowned for it’s poor turn mode and it does
not disappoint in this matter. With a D turn mode, the
Gorn CA is one of the most sluggish ships in this class.
However, while many see this as a weakness, in truth the
weapons arcs on the Gorn CA make this an advantage if
played right. I will explain on this a bit further down.
The key here to remember is that the CA does not turn
well, so don’t get into a dogfight, you will usually
lose. After movement lets look at ECM. This is an
often-overlooked area of any ship tactic and with the
Gorn CA it is an area that can make a nice difference in
a fight. The nature of Plasma is such that ECM does not
have a profound effect on how it works. In fact only a
major ECM shift can cause any effect. With this in mind
the Gorn CA has a unique advantage, early in the fight
the Gorn Commander can safely use all his extra power to
up his ECM levels and thus make him harder to hit.
This
advantage cannot be overlooked. The Gorn CA is one of
the toughest ships in the game, easily as tough as the
federation CA and almost as tough as the Hydran Ranger.
This means it can take an incredible pounding and still
be a decent fighting ship. When you take into account
it’s good shielding, the use of ECM can make a Gorn ship
VERY tough to hurt. Another factor that plays into this
is the ability of the Gorn ship to fight a VERY
effective battle at range 15. With the ECM shift and the
low yield of most races weapons at this range the
effectiveness of using the extra power to ECM becomes
obvious. The next area and the one everyone has
been waiting for, weapons. The Gorn CA comes armed to
the hilt with 8 Phaser 1’s and 2 Type G Plasma
Torpedoes. Lets begin with the Phasers. The
Phasers on the Gorn CA are its primary armament. Now I
know most people feel that the Plasma is the primary
weapon but this is just not true. The Gorn CA possesses
the best weapons arcs on plasma of any ship in the game.
From all angles at least 4 Phasers can fire and on the
front and rear arcs 6 Phasers can be brought to bear.
This means that the Gorn CA can deliver the same Phaser
firepower to the rear that the federation CA can deliver
to the front.
This
incredible firing arc system is the major strength of
the Gorn CA and a counter to its slower turn modes. By
making it impossible to find a weak spot on the CA the
turn mode is no longer a problem. In fact it is an
advantage because now the Gorn commander has an edge.
Most people forget about the weapons and make the
mistake of coming at the Gorn CA from the rear. They
usually only do this once.
Since all
the Phasers are type 1 the Gorn vessel does decent
damage even at medium range with JUST its Phasers. As
far out as range 15 the Gorn CA can average 4 points of
damage on an opponent from ANY angle. This is more than
any other ship can average except in their front arc.
Besides
Phasers the Gorn CA also packs 2 Type G plasma
Torpedoes. Most people consider the G basically a heavy
F torp and downgrade instantly. This is a mistake, the G
torp has a good range. At range 15 the Type G torp can
deliver 15 points of damage. This is better than any
other heavy weapon in the game at this era except the
plasma R.
The G’s
are set in offset arcs. This provides a narrow area of
fire where both can hit the same target at once. However
this is not what they are designed to do. Each plasma
has a huge arc covering their respective sides of the
ship. As such it is possible for the CA to deliver at
least 1 plasma torp and 4 Phaser ones in a typical
broadside volley. Now that we see what the Gorn CA
has, lets figure out how to use it. First we will begin
with the plasma. Plasma is one of the easiest weapons to
start learning SFC with. It is also one of the most
misused weapons in the game.
Plasma
packs an incredible punch; in the case of the Gorn CA it
can deliver 20 points of damage at close range with a
single weapon. This is the key to using plasma. A plasma
weapon can typically deliver the same damage in one
shot, that an entire volley of heavy weapons from other
races can do. As such plasma should ALWAYS be fired in
single shot volleys.
In the
case of the Gorn CA, the plasma is placed to perform the
function of crushing a shield. Basically the Gorn ship
positions to fire plasma and then dances out. The plasma
will crush or damage a shield, then the other plasma is
brought to bear and the same task performed. In this way
the plasma is used to drop or damage as many shields as
possible. The Phasers should be held early in the fight
to provide good close defense as well as waiting for an
open shield.
By firing
the plasma in single volleys you keep one plasma armed
at most times. At the very least one is always on the
verge of arming. This is an excellent deterrent to make
sure an opponent keeps his ranged. When mixed with
Phasers, the plasma makes an ugly surprise for those
silly enough to get close. Now this seems like a simple
tactics set but in truth this is the basis for most Gorn
tactics. Lets take a more direct look and see how these
basic premises can be applied. Below I will describe
some specific tactics for using the Gorn CA.
Gorn
Anchor: Lets start
with the most well known of the Gorn tactics. Basically
the way this tactic works is to close with the enemy and
grab him with your tractor beam. Drop your speed and
reinforce your shields. Then pound the enemy until they
are dead. This works well for the Gorn CA due to its
tough nature. When in a one on one slugfest few ships
can stand up to the CA. This tactic will leave the CA
bloodied and damaged but in most cases victorious. A
more practical approach to the Anchor is to first knock
down a shield or two and do some internals to hurt the
opponent. Then close and finish.
Plasma
Ballet: This is a
broad term for a very general set of tactics. Basically
it involves a plasma boat making its attack run and then
flying away to rearm. The Ballet part of the title came
from its use against other plasma ships. They almost
seem to dance as both seek the best firing position
while trying to stay safe.
Gorn
Broadside: This is
a specific variant of the Plasma Ballet approach. The
Gorn ship uses its ability to fire good volleys from a
side. You get on a crossing pattern with the enemy ship.
Usually presenting your #2/#3 or #5/#6 shield. You need
your speed to be a bit more than the targets to make
this effective. At around range 15 as the target closes
to attack, fire your plasma and turn way from the
target, doing a full 180. The target can either close on
you and eat the plasma or turn away. If he closes you
finish the 180 turn and fire the other side then turn
away again to present side one.
Even if
the target manages to get a fresh shield to the second
plasma he will eventually lose his shields in the front
to this tactic as long as he seeks to close. When you
have an open shield fire Phasers as the opportunity
presents itself.
Shield
Shredder: This is
a tactic I developed myself and have yet to see others
make good use of it. The goal of this tactic is to leave
the enemy with little if any shields on ANY facing. You
begin with standard plasma volleys. Firing one at a
time. However you do not wait for optimum shots on a
down or weakened shield, you take any shot that will do
damage to a shield. Do the same with Phasers on
undamaged shields. After one or two volleys like this,
switch one of the type G torps over to enveloping. When
it hits, the enemy shields will slowly be stripped away.
When two or more shields are down or nearly so set the
second to enveloping as well. Another volley and you
have your opponent. Suddenly he has no shields and is
facing a Phaser boat that can fire from any angle plus
double strength plasma.
Gorn
Shuttle Swarm:
This tactic works best against cloaked vessels. Gorn
ships carry more shuttles than the average CA. The key
here is to arm your ship or group of ships with as many
admin shuttles as possible. The all shuttles are
launched and told to attack the enemy. Shuttles will
soon swarm any cloaked ship. Another use of this tactic
is to provide a nearly impenetrable missile defense
shield. All those shuttles suddenly become the ultimate
point defense system.
Phaser
Enema: This tactic
was developed almost exclusively for SFC. Basically
opponents facing a Gorn ship tend to stay at medium
ranges and high speed. When they suspect plasma fire
they turn and run, presenting the weaker rear shield.
The Gorn vessel will forgo the use of plasma for a while
and use Phasers to down the rear shield and slowly gut
the enemy. Use your Psuedo’s to force the opponent to
turn away. When he presents his rear shield fire all
Phasers. Keep repeating as needed, occasionally use real
torps to keep him honest. Sooner or later the rear
shield will fall and the opponent will begin to be hurt.
Now is your chance. If he breaks off you gut him slowly.
If he closes you pound him with plasma.
With these
basic tactics in hand lets look at each of your possible
foes and see how to best employ the Gorn CA.
Romulans:
The traditional
enemy of the Gorn, fights with Romulans tend to be long
and drawn out affairs. Neither side can get to close due
to the power of the other side’s plasma. These fights
typically are a bloodbath in the end but this is the
kind of fight the Gorn can win. Use the Broadside tactic
and mix it with the shuttle swarm. This will keep him
honest with the cloak. Use T-Bombs for flashcube effect
to get some plasma shots in. Try to keep range 5 or
better at all time and keep your speed near 20. This way
if he uncloaks you can scoot out to a distance that
neutralizes the heavier plasma he possesses. Once he is
damaged and you are sure he has no plasma go for the
anchor to keep him from cloaking and fleeing.
Federation: While
technically an ally, some border skirmishes still occur.
Use your ECM advantage to provide as much defense
against photons as possible. Try to keep the range at
about 15. Employ the broadside tactic and try to get to
his rear arc. Once there, stick like glue on him in this
position. The Federation ship is very weak in the rear
as far as weapons. You are just as maneuverable and can
easily stay on his tail. Use the plasma in single shot
volleys and knock down a shield or two. If two shields
are down and at least two more are damaged shift to the
shredder tactic. Otherwise use opportunity fire with the
Phasers on a down shield.
Klingons:
This is not a
historical enemy but is probably one of your toughest
foes. Use an ECM shift in your favor to neutralize his
disruptors. He will typically fly fast and way from you
so use the Phaser Enema to effect. Hold back the plasma
for sure shots. Use the Shuttle Swarm to counter drones
as well as keeping near speed 20. The Klingon ships are
tough but that glass rear shield is their weakness. The
Phaser Enema is most effective on Klingons.
Lyrans:
Against the
typical Lyran player this is an easy fight. They will
seek to close to use the ESG as a ram plate. Just go to
the broadside tactic and nail them as they come. Against
the advanced players the Phaser Enema will be the only
tactic for a while and it will take a while since they
have better shields than their Klingon allies. If they
do keep closing fire plasma so it hits BEFORE the ESG
gets to you. When you have a down shield fire all
Phasers. You are hoping to disrupt their weapons on
their pass.
Hyrdans:
The first problem
you will have are their fighters. Begin by loading your
plasma as shotgun. This will knock the fighters out
early. Without the fighters, in a BPV match the Hydran
ship is much weaker than yours. Against the Ranger just
move to the Broadside and keep him at range.
General
Tactic: The Gorn
posses a fair number of transporters and boarding
parties. The Gorn CA has 3 transporters. Set your hit
and run raids to hit the enemy transporters first. This
will neutralize their ability to use H&R on you to take
out your plasma.
These are
just some of the basics that come into play when using
the Gorn CA. The next time you face or fly one maybe
this article will help you take it less casually.
.
Contact the web master at
sfaret@msn.com